Summer berries are in full swing, and in our house that mean it’s Jamming Season!
Getting creative with jams is so much fun. We love making small batches so we can test out different flavor combinations. And if we’re really thinking ahead, summer jamming time is the perfect time to think about stocking up on Christmas gifts. (I know, we’re getting started REALLY EARLY!) We love giving useful homemade gifts, and gift baskets featuring an assortment of summer jams is a fun gift idea that makes the berries of summer last all year long.
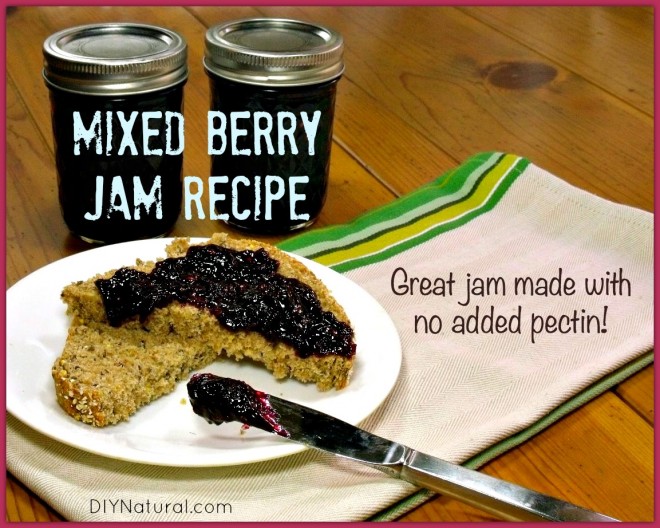
Today we’re sharing our favorite way to make and can jam – without added commercial pectin and without the pesky water bath. Let’s dive in!
The Key Ingredients in a No-Pectin-Added Jam
Fruit (and Pectin)
You can’t have a jam without your base, and most of the time that is going to be fruit. Fruit for jamming should be firm and ripe (but not over-ripe).
Fruit isn’t just an essential base, fruit provides our jam with natural pectin – that magic substance that creates the gelling that we are looking for in our preserves. Many recipes will call for you to add commercial pectin, which will amp up the gelling capability of the fruit, resulting in a jam that takes less boiling time. To add or not to add commercial pectin is a personal choice. But, most often I won’t add pectin because I love the thick, fruit-preserve texture and flavor that comes from just using the fruit’s natural pectin.
If you’re not using commercial pectin, you really need to know your fruits. Different fruits contain different levels of natural pectin, so when choosing the fruits for your jam, you need to pay attention to which category your fruit is coming from. If you want to make a jam with all low-pectin fruits, consider adding some high-pectin fruits into the mix to help with the gelling. (Or, you might need to break out the commercial pectin to actually achieve a gel.)
High Pectin Fruits – apples (especially tart apples), crab apples, raspberries, blackberries, currants, cranberries, Concord grapes, and plums
Low Pectin Fruits – apricots, blueberries, cherries, peaches, rhubarb, and strawberries
Acid
Acid is essential to jam because it helps the pectin create that beautiful gel. Typically, fruits that are high in pectin already have enough acid to gel properly. But low-pectin fruits tend to be lower in acid, meaning that you need to add some high acid fruits or lemon juice to get the acid balance right.
Sugar
Sure, sugar makes your jam sweet, but it also plays a crucial role in helping the pectin do its thing. Cane or beet sugar are traditionally used for making jams because of their chemical structure. If you would like you use honey in your jam, replace only some of the sugar with honey, since it can overpower the fruit flavor and affect the jelling process. (If you’d prefer not to use any sugar, you can learn How to Make Naturally Sweetened Freezer Jam that uses natural pectin.)
Mixed Strawberry Jam Recipe
Recipe yields roughly 3½ pints of jam*
(*If you would like to make more jam, I recommend only doubling this recipe. Making too much jam at one time can have a negative effect on the gelling process.)
Ingredients
- 2 cups blueberries (1 pint)
- 2 cups blackberries (12 oz)
- 2 cups strawberries, stemmed and diced (1 lb whole berries)
- 1 medium lemon, juiced (2 Tbsp juice)
- 3 cups sugar (find organic cane sugar here)
The Process
Prep the fruit and jars
- Wash your fruit and remove any stems.
- Wash your jars with hot, soapy water and place them in a 200°F oven to keep them warm. (NEVER put hot jam into cool jars. You risk shattering the jar from the quick temperature change.)
Heat it up
- Use a wide pot that is 3-4 times the size of your prepared fruit. Bring the fruit and lemon juice to a boil over low heat. (This could take 20-30 minutes.)
- Once the fruit has come to a boil, add the sugar and stir until it has dissolved. Turn up the heat and bring the mixture to a rolling boil that can’t be stirred down. The mixture will sputter and foam. That foam won’t do any harm, and you can always skim it off before filling your jars.
Test for the gel
After your sugar and fruit mixture comes to a rolling boil, you will reach the jellying stage. Depending on the moisture level of the fruit, it could take anywhere from 5-20 minutes of boiling. Once the mixture starts to thicken, you will need to test for the gel. There are three options to test if your jam is set and ready to be canned.
- Temperature test – The ideal jellying temperature is 220°F for a nice, spreadable jam. Take the temperature using a candy thermometer and be sure to stir the jam thoroughly before taking the temperature.
- Freezer test – While your jam is cooking, place a small plate in the freezer. Once your jam starts to thicken, spoon a small amount of the mixture onto the plate and place it back into the freezer for 1 to 2 minutes. When you remove the plate from the freezer, your jam shouldn’t feel hot or cold. Press the jam with your finger, and if it wrinkles it’s done. As an added test, you should be able to trace your finger through the center of the puddle of cooled jam, and the jam should stay put.
- Spoon or sheet test – Dip a cold metal spoon into the boiling mixture. Away from the heat, tilt the spoon, so that the mixture runs off the side of the spoon. When the mixture slides off of the spoon in one smooth sheet, it has reached the jellying stage.
Fill the jars and process
- Fill your clean (hot) jars with the jam, leaving about ¼ inch of head space before the rim. Wipe the rim of the jars clean with a damp towel, and top each jar with a clean, fresh canning lid. Tighten the bands on the jars firmly.
- I prefer to process jams using the French Canning Method, which makes canning jams simple because it avoids the water bath. The French Canning Method uses the heat from the hot jam to activate the resin strip on the lids, creating the seal. Simply turn the jars upside-down on a cooling rack for 30 minutes or until you hear the seal pop. Then, turn them right-side-up to finish cooling. (Note: This method is not recognized as a safe canning method by the FDA, however, it is the way grandmothers have been canning jams for ages, and I have never had a jar that was properly sealed go bad.)
- After the jam has cooled, remove the bands and do a good check on the seal of the lids. Any jars that have not sealed should be refrigerated. Then, give your jars a good wipe down before replacing the bands and storing the jars.
If you would prefer to can the jam using a water bath canner, you can find detailed information on the Water Bath Canning Process on my website. If you like the science behind the jamming process, check out this Preserving Fruit: Jam Basics article.
Have you made no-pectin jam before? How did it turn out?
*******
About Sarah Ozimek
No-Pectin Jam Basics and a Mixed Berry Jam Recipe was written by Sarah Ozimek.


